Inside the Mite - a Study of Wood Deterioration
Part II
Words and photos by Dick
Rank
(Click on the photos to see larger versions)
In Part 1, we reviewed typical tail structural problems occurring because of heat and moisture, unavoidable factors in the life of an aircraft, whether wood or metal. In the case of the Mite, these problems revealed themselves early in the fifties and were dealt with by several Factory Service Letters and federal AD's.
According to early Mooney, Inc. letters, the Airworthiness Directives became necessary because owners did not make corrections as directed in service letters, resulting in accidents. The best general source materials on necessary repairs are Mooney Service Letters 14, 16 and 17.
SL14 outlines procedures for checking play in tail surfaces. SL16 deals with glue deterioration, inspections, disassembly, alterations and repair of empennage, fuselage and wing. SL17 specifies inspection procedures and repairs for the rear fuselage bulkhead. They cover everything we will discuss. It is also advantageous to be familiar with AD's so that you can check the work of certified aircraft and power plant mechanics who work on your aircraft. Most of those documents are available elsewhere at this site.
We started with tail surfaces, so lets move "forward" to the fuselage. The Mooney boys' design feature of tail feathers that move together as a "trim" unit is still with us in all new Mooney aircraft. This feature does depend heavily upon the strength of the rear bulkhead to carry stress loads as tail control surfaces are moved to control the aircraft.
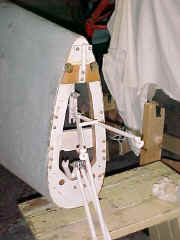
Stresses are carried through tail spars to several attach rods which are also bolted to the rear bulkhead. You can see in the picture on the left that the rear bulkhead must maintain a strong connection to the plywood rear section of the fuselage.
Shown on the left is a rotted plywood piece removed from the rear of a fuselage. Lengthy exposure to moisture and heat can rot and delaminate the rearmost surfaces of fuselage plywood on both top and bottom, eventually allowing separation of the entire tail unit from the fuselage.
On one of the Mites we are currently working on, advanced plywood rot required replacement of two areas of the fuselage at the rear bulkhead. Prior repairs by an A&P unfamiliar with skarf joint techniques required in such repairs, had simply cut the old plywood away on the bottom and glued on a patch (see photo below). When we pulled off the fabric, the patch fell off. The aircraft had lost about 1/3 of its structural strength at that crucial point alone. I suspect that many Mites have been unnecessarily destroyed because of this type of damage. Most of it can be repaired.
Furthermore, the rear bulkhead can delaminate and/or crack. It is a chronic deterioration problem addressed in factory service letters and AD's. They require addition of metal plates to both front and back of the bulkhead to strengthen it. Inspection of the interior of the rear fuselage will show any fuselage plywood rot if it has occurred. Discoloration of the plywood does not necessarily mean rot is present.
I'm tapering the rear fuselage to make a proper skarf joint repair.
Here you can see some finished skarf tapering.
This photo of the rear bulkhead shows rotted plywood at the top, dangerous repair work at the bottom, and a deteriorated glue joint.
I removed the entire structure in 5 minutes by running a knife blade through the joint.
Any attempt to ferry this aircraft would have been fatal.
Skarf joints require considerable skill, since the two edges of plywood to be joined must be sloped at a ratio of twelve times the plywood thickness, trimmed to insure a tight overlapping joint, glued and clamped. Where possible, they are best supported underneath by an airframe member. If these procedures are followed, the joint is as strong or stronger than the plywood. Visual inspection should reveal the metal reinforcing plates, and glue should have been slightly squeezed out in the inside of the fuselage where the rear bulkhead and plywood meet. If the visible glue at that joint is powdery or crumbly, the strength of the bulkhead-fuselage joint may be compromised.
Complete restoration of the fuselage usually requires some plywood replacement and application of filler where the plywood has become "rippled". If rippling is present on many plywood surfaces, this will result in reduction of aircraft speed and efficiency. Coating of both inside and outside of fuselage plywood with epoxy varnish will give excellent protection against future rot and strengthen the plywood to some extent.
On the
left is the form for bending a new piece of plywood for the rear bottom of the
fuselage. Beside it is the dangerous repair that fell off when the fabric was
removed.
This
photos shows the old rear bulkhead and the new one above it. This kind of
woodwork is beautiful to look at.
 There
may also be minor plywood deterioration around wood screws used to fasten
fairings, and also where the rear fuselage plywood attaches to the forward
fuselage. Metal attached to wood has a way of attracting moisture. Selective use
of epoxy will help this problem
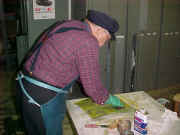
Here Mr. Ben (Ben T. Epps) is checking the fit of the plywood skin repair. Note the paper-thin tapered edge of the plywood necessary for a good skarf joint. Mr. Ben, now 84 years old, first soloed at the age of 13. He's a retired airline pilot who flew many missions in C-46's over The Hump, and really knows wooden airplanes. He is an excellent mentor.
Sharp-eyed readers will have noticed that in this photo the bulkhead is reversed (it was a posed photo). The bulkhead was correctly installed later.
©2001 Richard C. Rank